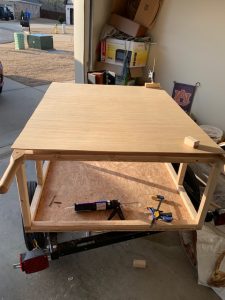
The top temporarily laid out.
So now that I had the body framing built, it was time to work on the top. Personally, the top wouldn’t have been my next task, but I was (loosely) following set of plans so the top was next on the list. This was particularly difficult for me as it required me to “cut a straight line.” If you’ve followed along with the process of the build, you know that my “straight lines” look like spaghetti. That said, my straight line side kick, Windle (who, by the way, so generously offered his garage for me to build in) was unavailable and that meant I had to cut the piece myself. I laid it out like it was going to go on, using the already cut edges as a guide, I scribed the line and went to cut it out.
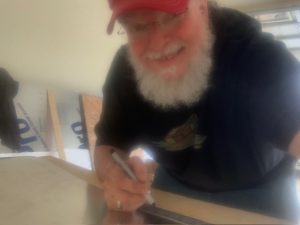
I’m pretty good with laying stuff out…it’s the cutting that gets me.
I actually surprised myself as my single cut came out fairly straight. While my cutting skills, are still a little suspect at best, I decided that I should cut individual pieces a shade large and then sand them down to where they should be. My sanding game is “on point.” This approach seemed to work pretty well, but it did probably take longer than it should have. This was especially true when it came to cutting “holes” in the top. Cutting the holes for the cooler and the firebox made me a little nervous as that was the first time I had done anything like that.

The hole for the firebox is cut out and sanded and filed to the correct size.
After measuring 3 times (not only twice), I drilled holes at the corners and took the jig saw followed my lines and cut it out. I again supersized myself as my cuts didn’t tun out half bad. After some sanding, using files and a power sander the firebox hole was complete. Moving right along, next it was time to cut out the hole for the cooler. This was particularly nerve racking for a couple of reasons. First off, I was thinking that if I screw up this hole, that I’d have to redo the entire top including the firebox hole that I worked so hard to get perfect. Secondly, the cooler was kind of “funnel” shaped. I took the cooler apart made the marks and cut it out. Once I got the cooler hole cut out, I couldn’t make the cooler fit. I re-watched the video again and again, reviewed the plans again and finally finagled it around and it fit perfectly.I built a platform for it to sit on which, allowed me to adjust the high perfectly and added some stability. I screwed the platform to the floor of the cart and installed some eye hooks and strapped the cooler down using the eye hooks as anchor points. I also made a drain hose with some tubing to drain the melted ice (on the other side of the cooler).
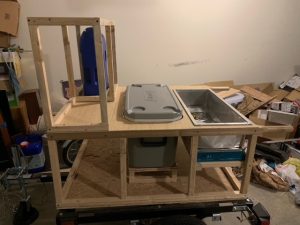
The cooler fits the hole perfectly. Shown here in place and sitting on its platform.
Next, it was time to make the firebox. The firebox was made out of ten inch wide aluminum roofing flashing. The flashing had to fit inside of the hole I cut for it, and it had to be pretty accurate because it had to function properly. The job of the fire box is to keep the heat contained so there is no way the heat escapes. Before I could secure the firebox in place I had to place and mount to stove. With the stove placed, mounted and adjusted, I installed the firebox by screwing it to the top of the stove. At that point I shaped the firebox and cut it to size and then trimmed it out at the top.🌭
0 Comments