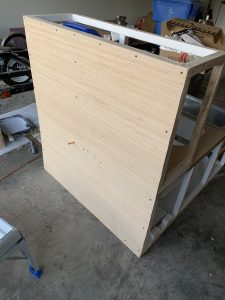
Front wall installed, square on the bottom & sanded to fit.
Now that the front wall had been cut and installed, it was time to build the sinks and install the hot water heater. If you look closely at this picture, you can see the end of the copper tubing coming through the front. Back when I was installing the stove, I shaped and ran the copper tubing and had to wait to put the front wall on to make a flare nut gas fitting on the front to make the propane connection. Measuring again took priority as I had to measure where all of the frame members were and then transfer those measurements onto the front of the cart to make sure I would be able to mount the exterior components through the front wall and into the framing. This is not the way I would have done it, but there was a method to this madness and it all fell into place as I followed the steps. As it turned out, without the front wall already in place, there would have been no way to attach the exterior components, an they had to be in place to determine where the plumbing would come through.

The sinks were made just as simple boxes with the tops cut out. For the two bowl sink, I used two steam table pans. All I had to do was just punch a hole in the bottom of each one and install a drain. The hand washing sink was made out of a stainless steel mixing bowl I got at Wal-Mart for about $6.00. I built it the same way as the two bowl sink. I installed a bathroom sink faucet for the hand washing sink and a kitchen faucet for the two bowl sink. Before I installed the hand washing sink on the front, I went ahead and made the flare nut propane connection. This connection was done with a special flaring tool and the connection had to be done on the outside of the cart. Once it’s flared, anything that is attached to the tubing will not fit over flared end. I went ahead and made that connection so I would have plenty of room to work with it before I installed the sink.
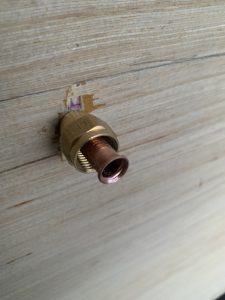
Tube comes through sleeve slipped over it and tube flared.
Now that the gas fitting was installed, it was time to install the hand washing sink and the hot water heater. This is where the earlier measuring came in. It was imperative that I got the sink and the hot water heater attached directly to the framing, so they would both be steady and not come apart. Once the sink and hot water heater were installed, I knew exactly where the plumbing should go. The plans called for the hand washing sink to be held on with two screws that went through the back of the box, the wall of the cart and into the framing. My thinking was that if two screws would have done the trick, then four screws would have been twice as strong. So I put four screws into it to make it that much stronger.

Hand washing sink installed.
Now that the propane connection and the hand sink were installed, it was time to mount the hot water heater. Because of the dimensions of the cart and the way the hot water heater mounted up, I had to make an “attachment point on the inside of the cart to hold the bottom of the heater to the wall. I initially started with the top of the heater hung on a screw that was put into the framing. Then I determined where the bottom connection should have gone and drilled a tiny hole through the screw plate into and through the wall of the cart. I then glued a wood block to the inside of the cart where the screw was to come through. When the glue dried, I then drove a screw through the heater’s mounting plate through the wall of the cart and into the wood block. 🌭
0 Comments