~This post continued from part twelve. Just like there are buildings with no thirteenth floor, this blog has no thirteenth part.~

Exterior components installed.
With the block glue dry and the screw having been run through the mounting plate, through the cart wall and into the glued block, the hot water heater was now sturdy and tight. Now, the only thing left to do on the front (besides painting and running the plumbing) is to add a platform on the tongue for the propane tank to sit on, and add strips to the front wall to prevent it from rolling. Plus, I’ll have to cut slits and run ratchet straps through the front wall to further secure the tank. With the sink and heater on now I can determine exactly where the plumbing goes. There should be two holes immediately underneath the water heater and just large enough to accommodate without kinking or squeezing the flow.
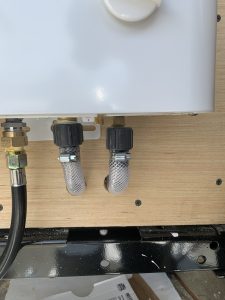
Cold water in / Hot water out.
If you’ll remember, a few posts back, I mentioned running the plumbing but got sidetracked as I had to build the darn sinks first. Now with the sinks built, it’s just eyeball work as far as where the plumbing should go. I determined that the first two holes should be right below the water heater. With those two holes punched, I connected the hoses to the hot water heater and proceeded to feed the hoses right back through the front wall. After feeding the hoses back through the wall of the cart, I had to find the hot water out hose to finish connection. After locating that hose, I simply “T”ed that hose off to feed the hot water taps.

The “T” ed off hose that comes from the pump. This T was “T”ed again for hot and cold taps.
Once I got the hose back inside the cart after making sure all the hot water heater connections were on point, it was simply a matter of “eyeballing the measurements” for exactly how long I should make the hoses. Then when I figured “yep, that ought to be long enough” I cut the hose with a razor knife, and put it all together with fittings and radiator clamps.
Note To Self: Put the clamp on the hose BEFORE you fit it all together. You can only guess why I had to make that mental note. This step took a bit longer than it should have as I had to undo the connections to, you guessed it, install the clamps on the hoses.
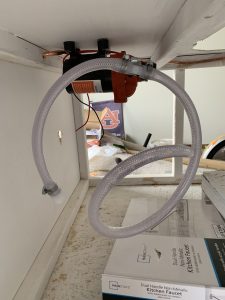
the “T”ed off hose attached to the pump.
Now that I had the supply connections put together and “roughed in” (that’s a plumbing term I learned during the build, LOL), I hooked all of those lines to the pump. This was pretty simple to do because once I got the threaded fitting for the pump installed on the leg of the “T” configuration, I just wrapped the threads with Teflon® tape and screwed the hose to the pump. At that point I was ready to install the sinks, and run the drain plumbing. I still had to put ends on the other end of the newly installed supply lines to attach them to the sinks, but I was making some positive progress.🌭
0 Comments