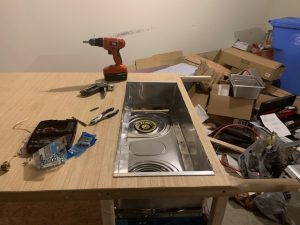
The firebox is in essence a steam table…where you boil the dogs and steam the buns.
I didn’t show a lot of the firebox in the last post, so I decided to go into a little more in-depth with this post. The firebox is the “work horse” of the cart. It is where you boil the dawgs, steam the buns and keep the warm toppings warm.
There are 3 main parts of the firebox. They are the stove/bottom, the sides, and the trim pieces at the top. All 3 of these elements work together to make a “cohesive unit.” The firebox build was a particularly daunting task to me as I had the raw materials, but they had to be assembled in a precise way, and the finished product had to be very precise. The interior dimensions had to be very close to exact because if the hole was to big, the pan would fall through and if it was too small, the pan wouldn’t seat properly.
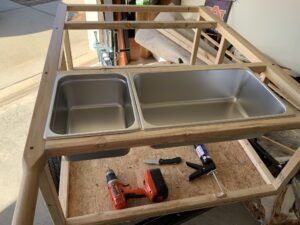
The rough placement of where the pans should go to determine stove height.
After cutting the hole, the first order of business was to determine the height of the stove/bottom of the firebox. Several things came into play with this measurement. First, I put the pans in to make sure the length and width were as they should be. Then, with the pans in place, I took some measurements to determine the actual height that the stove should be, taking into account the needed flame height, the top thickness and the trim thickness. After determining the height for the stove, I then made the supports that it would sit on. It was important at this point to remember that the top of the stove was the bottom of the firebox, so it had to be done perfectly.

Stove supports constructed and stove now in place.
With the stove supports built and installed and the stove in it’s proper position, it was now time to make the sides of the firebox. This step truly challenged my metal-working skills (which were non-existent at this point). The sides were made for roof flashing that came on a 10′ roll. This step required me to take measurements and make creases in the flat flashing to form a rectangle the exact size of the opening I cut earlier. This took me 3 attempts and two more rolls of flashing before I realized that the video that showed how it was done, was BACKWARDS!

The flashing for the firebox is in place and now has to be cut to fit.
After figuring that out and now on my 3rd roll of flashing, I was finally able to get the darn thing to fit properly. It took me 2 solid days to complete this step but I wasn’t going to let it beat me. Now that the flashing was cut and creased to size, it had top be creased again (to create a rim to screw to the stove) and notches had to be cut out of the rim to allow for it to be folded at 90ᵒ angles. Once all of that was cut, it was time to install and trim it out. Using the rim that I just created with the extra creases and notches, I screwed the flashing to the top of the stove. Once I had that done, I cut the excess that rose above the edge of the opening off even with the top. As I continued to attach the firebox sides in the appropiate spaces the curves and the “floppiness” disappered and everything tightened down. Next, it was time to trim out the top of the firebox.

The top of the firebox, now trimmed out with aluminum.
This was not really difficult, and in “theory,” was a pretty well thought out step. However, after using the cart and actually setting it on fire, I realized that this ventilation system had some serious issues and wasn’t ideal. I have since made modifications to that system and it works much better now.NOTE: The ventilation system was not the only culprit for causing the fire…the less than adequate heat break between the firebox and the cooler was the main issue, and the ventilation system just added insult to injury. That break has since been replaced with a one inch thick “fire break” that has been completely painted with 700 degree heat resistant paint and clad with aluminum flashing and angle.🌭
0 Comments